

how to draw a deer easy
How to Draw a Deer
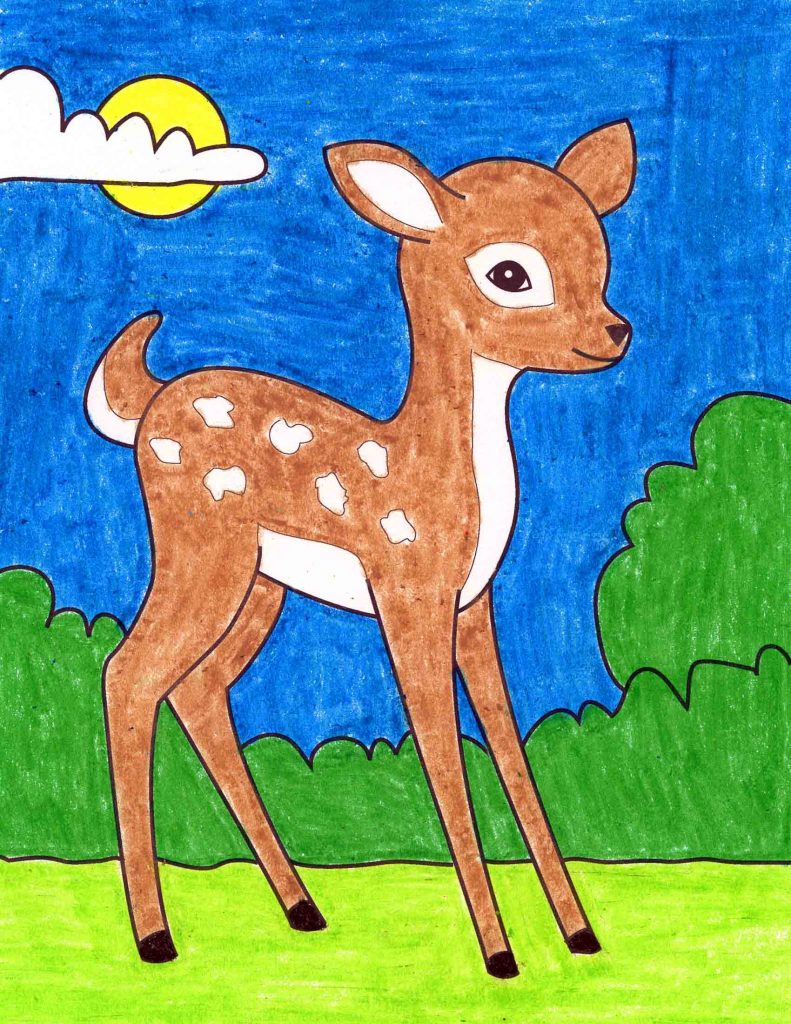
Learn how to draw a deer with this new step by step tutorial. Who can resist drawing a baby deer with such a cute face?
If students can learn to see the basic core shapes of their subject matter, before they even start to draw, it will help them immensely as they continue their studies.
In this case, this young deer has a very round head, and a pill shaped body. Once those two elements are down, in a good size and relationship to each other, the rest of the drawing is much more likely to fall together. The large ears, upturned tail and thin legs are easy to add once a well-proportioned head and body are in place.
Not all animals have as clear an example of starter shapes as I think this deer has. But sticking with projects that do, when students are just figuring out how to draw, is a great way get started. The trickier subject matter can come later on, after some confidence in their skills has been established.
MATERIALS
- How to Draw a Deer (click to download a PDF)
- Drawing paper
- Black marker
- Crayons
DIRECTIONS
Time needed:45 minutes.
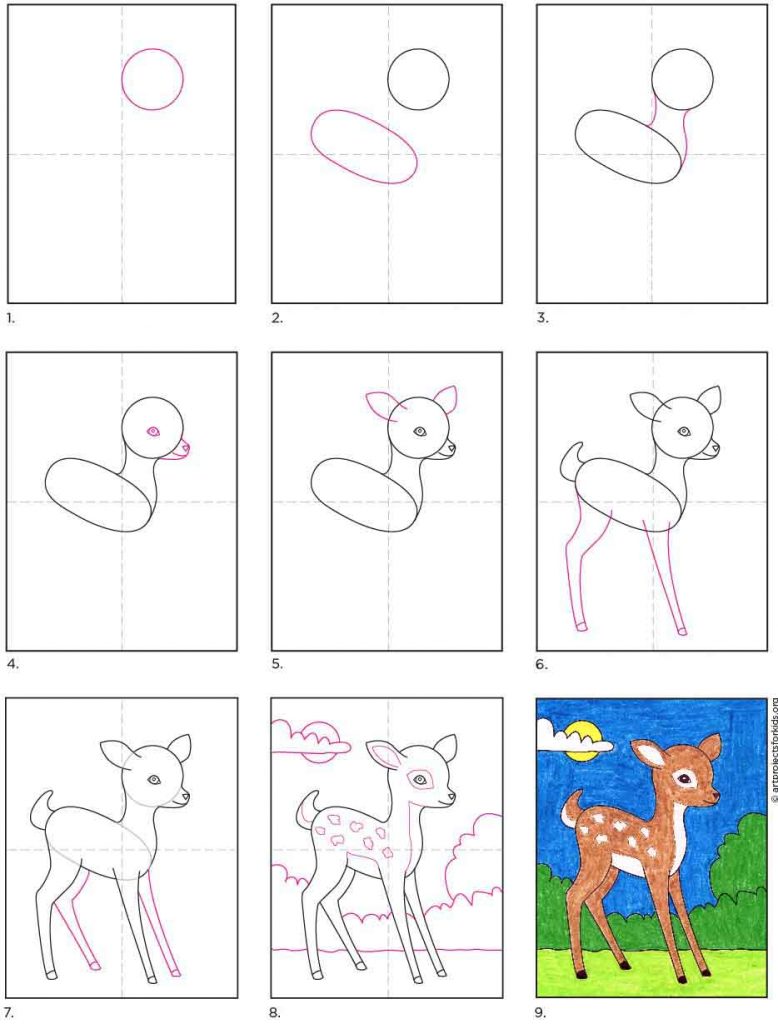
How to Draw a Deer
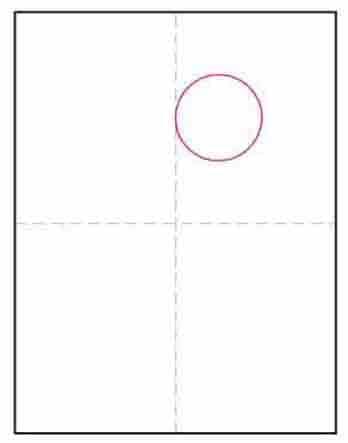
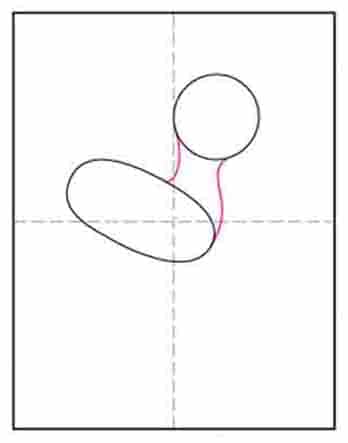
- Lightly draw a circle.
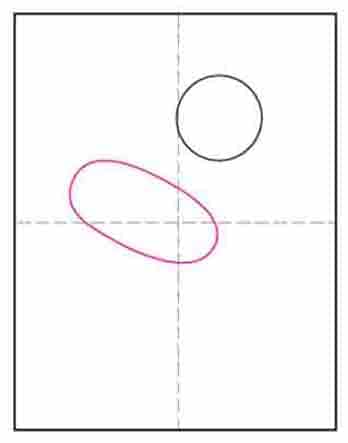
- Add a tilted pill shape below.
- Connect the two shapes with a neck.
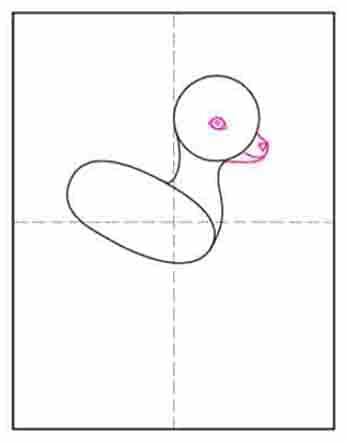
- Add the nose shape and an eye.
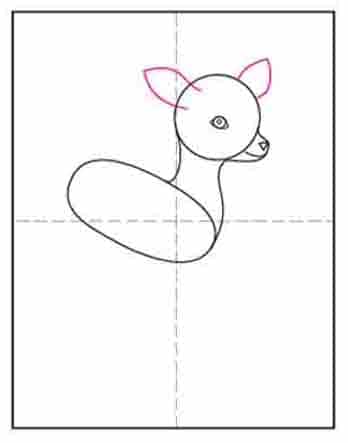
- Draw two ears on the head.
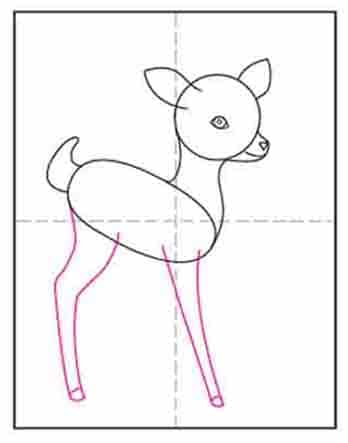
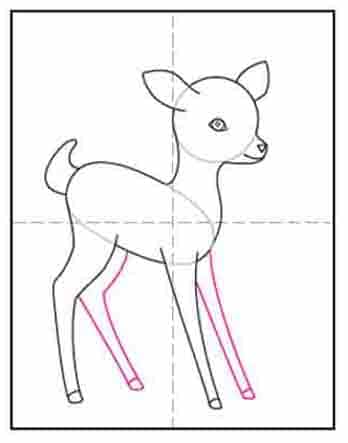
- Add a front and back leg as shown.
- Draw the other two legs and erase all the gray lines.
- Trace with a marker.
Add thin lines in pencil only for color guides.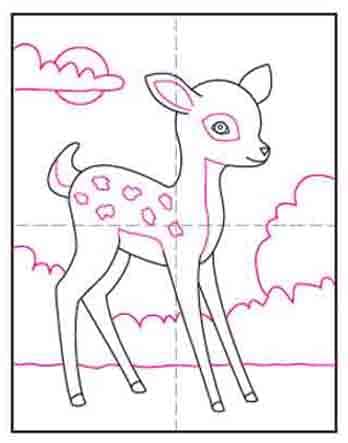
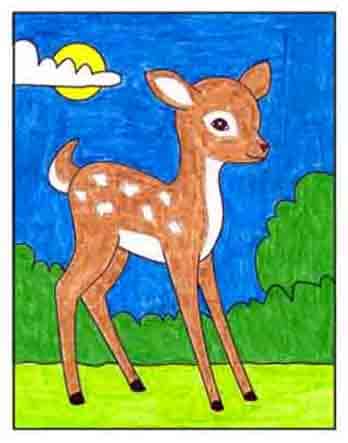
- Color carefully with crayons.
how to draw a deer easy
Source: https://artprojectsforkids.org/how-to-draw-a-deer/
Posted by: youngiriplard1942.blogspot.com
0 Response to "how to draw a deer easy"
Post a Comment